Ubi the Dragon

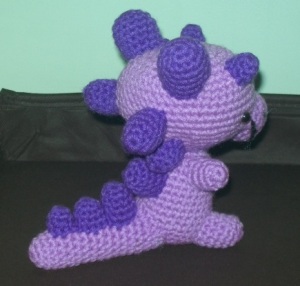
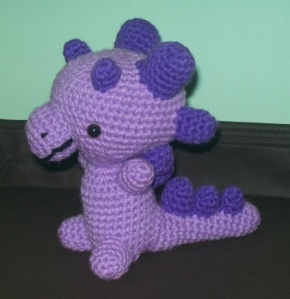
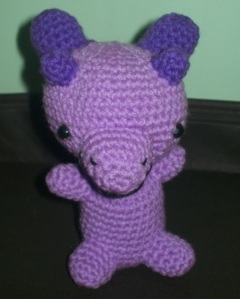
Quite a while ago I finished another crochet plushy: this time a little lavender dragon. I got the pattern from Ravelry (click here to go directly to where you can download the pattern). Instead of making it a rattle, like it said in the pattern, I just put stuffing in it to make it a plushy.

I didn’t know what to name him, because I don’t really know of any dragon names. Dad suggested to name him Ubi, because of his lavender color. “Ube” is a popular flavor of ice cream where we live (even though Dad is not a fan of its taste), and it happens to be purple. So I thought Ubi would be the perfect name for the newest addition to the crochet family.

Here are the photos of Ubi, my little dragon:

Ubi 1

Ubi 2

The misalignment of his muzzle will forever bug me.

Ubi 3

The assembling of the dragon was the hardest. The muzzle is not centered, which will always bug me. The spikes were a pain to sew in, as I (almost) always sewed them in slightly in the wrong place. Anyway, I think even with the wonky spikes and misaligned muzzle, Ubi looks great!

Crochet Flower Lanyard: Free Pattern

Today is a very special day for me. Today I will post my very first crochet pattern — a pattern I made all by myself!

I wanted a new lanyard for my phone because what I had at the time was old and boring. I wanted to crochet one instead of getting a new one so that it would be unique. However, when I searched the Internet for a nice pattern, all I could find were patterns that either only used single crochet (which I think is boring) or were too complicated for my taste. So I decided to challenge myself by making my own pattern.

So, without further ado, here is my first ever official pattern:

Crochet Flower Lanyard

MATERIALS:

  • 4-ply yarn (I used less than one 18-gram skein of Monaco Acrylic yarn.)
  • A 3.75 mm hook
  • Metal clip (the ones used in lanyards)
  • Yarn needle

LANYARD:

Crochet a chain about 33 inches long (or however long you want the lanyard to be.)

  1. Single crochet (sc) in second chain from hook and in the rest of the stitches until you reach the end of the row. Chain 1 and turn the work.
  2. Slip stitch (ss) in second stitch from hook and in the rest of the stitches until you reach the end of the row. Chain 1 and turn the work.
  3. Sc in second stitch from hook and in the rest of the stitches until you reach the end of the row. Finish off, leaving a long tail for sewing.

FLOWER:

Work in joined rounds. What I usually do is at the end of the round I join to the first stitch of the same round with a slip stitch. Chain 1, and then do as the pattern says.*

*For round 3, do not chain 1 before doing the chain 3.

  1. Magic ring, sc 6. (6 stitches)
  2. 2 sc in each stitch. (12 stitches)
  3. (Chain 3, do 3 triple crochets in next stitch, chain 3, join with a slip stitch to next stitch.) x 6. (This will create six lovely petals.) Do not join to the first chain 3. Finish off, leaving a long tail for sewing.

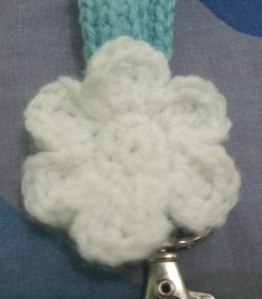
Crochet Flower

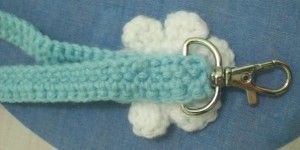
Sew the ends of the lanyard together first, with the metal clip in between. Then sew the flower on top of the spot where you sewed the lanyard together to hide any messy sewing. We’re done!

Crochet Flower (back view)

Crochet Flower Lanyard 2

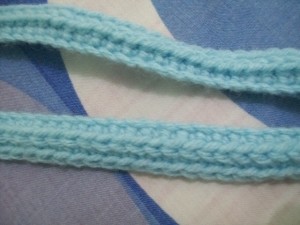
The row of slip stitches creates a raised bit in the middle of the lanyard.

Crochet Flower Lanyard 1

The finished lanyard — yay!

Here is the same pattern in Microsoft Word form:

Crochet Flower Lanyard Free Pattern

Goodbye Kitties!

A few weeks ago we took all the four kittens to the vet, leaving the mommies behind at home. We were worried because Charlie was getting very thin compared to the others and he wasn’t eating solid food (he would just drink milk from the mommy cats). He, Kitkat, and Dot also had diarrhea. We wanted to deworm all of them as well, just to make sure that they wouldn’t get sick.

It took quite a while for the vet to examine them all because he looked at them one by one and they were already cranky from the car ride in the carrier. Charlie, Dot and Kitkat all had eye problems, which would be cured by some eye drops. Kitkat and Heather also had fever, even though Heather seemed perfectly healthy to me. Basically the vet told us to give the kittens three specific medicines that I won’t bother telling you about. He also said that at their age, the kitties were ready to be separated from their mothers.

We locked the mommies out ( 😦 ) because it would be easier feeding just the kittens. For less than a week we were able to feed the them solid food (they LOVED chicken lungs for some reason) and give them their meds. They pretty much hated the medicine, but it was for their own good.

Sunday (March 29) was the set date for giving them back to the mommies. We had to return them because for the past few nights TC and Aggie would just stick to our window and meow from outside. I also had to start reviewing for a big exam, and I wouldn’t really be able to study if there were four active kittens running around the house.

On Sunday we put the kittens in the front yard for the mommies to get them. The cats didn’t seem to be coming to the house soon so we used a kitten as “bait.” We showed a kitty to the mommies, who were in our neighbor’s yard, and then returned it (I really don’t remember who we brought) to its siblings. Soon the mommies came and greeted their babies for the first time in (about) five days.

The one problem, though, was TC and Aggie couldn’t seem to lift the kitties back to their little shed in our neighbor’s yard. We helped them by placing the kittens close to the shed, hoping that they wouldn’t wander into the road.

The kittens are now happily living with both their mommies next door. Sometimes we see them from our yard or from the road, playing with each other. They all look happy and healthy. Kitkat used to have these weird stains under her eyes, but the eye drops helped and now she’s the most beautiful kitten I’ve ever seen!
Easter Egg

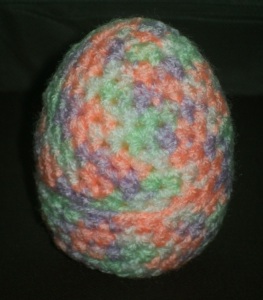
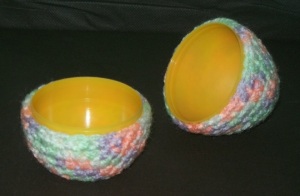
It’s finally Easter! Well, it is for me, but I’m sure in other parts of the world it’s still Saturday. But anyway, for this Easter, I crocheted a little cozy for a plastic egg I had. I used a multicolored Red Heart yarn (I don’t know what color it is, but the packaging says its shade is 08307.)

Since I was pretty sure that my egg was different from what the patterns on the Internet used, I decided to try making my own pattern. I basically used half double crochets to make it fit each half of my egg and decreased at the end so that it would fit snugly. I also used Elmer’s glue to stick the yarn to the plastic. The yarn seems to be sticking to the egg, so I guess glue would also work on other crochet projects!

Here are the photos of my lone Easter egg:

 Easter Egg 1

Easter Egg 2

Happy Easter everyone!